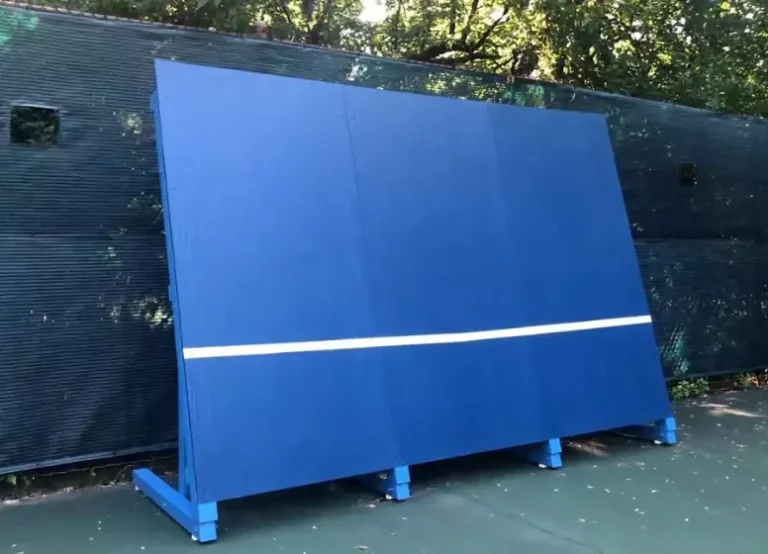
Are you a tennis lover looking for ways to improve your skills at home? Do you want to practice your backhand, forehand, and volleys without a partner or a coach? If so, building a tennis backboard at home might be the perfect solution for you.
A tennis backboard is a simple yet effective tool that allows you to practice your shots and footwork on your own. It is a flat surface, usually made of wood, that bounces the ball back to you after you hit it. With a backboard, you can work on your technique, consistency, and stamina without relying on anyone else.
How to Build a Tennis Backboard at Home

In this article, we will guide you through the process of building a tennis backboard at home. We will provide you with a list of materials, tools, and instructions, as well as tips and tricks to make the most out of your backboard. Let’s get started!
You may enjoy reading How Much Do Tennis Players Make?
Materials and Tools You Will Need
Before you start building your tennis backboard, you will need to gather some materials and tools. Here is a list of what you will need:
Materials:
- A sheet of plywood (4′ x 8′, ½ inch thick)
- Wooden posts (4×4, 8 feet long)
- Concrete mix
- Screws
- Tennis net
Tools:
- Circular saw
- Jigsaw
- Drill
- Hammer
- Level
- Shovel
You may enjoy reading Are Tennis Rackets Unisex?
Step-by-Step Instructions on How to Build a Tennis Backboard at Home
Once you have all the materials and tools, you can start building your tennis backboard. Here are the step-by-step instructions:
- Choose the location: Find a flat and spacious area in your backyard or garage to place your backboard. Make sure there is enough space for you to move around and hit the ball from different angles.
- Dig the holes: Dig two holes, about 3 feet deep and 3 feet apart, where you want to place the wooden posts.
- Insert the posts: Place the wooden posts into the holes and fill them with concrete mix. Use a level to make sure the posts are straight and stable. Let the concrete dry for at least 24 hours.
- Cut the plywood: Cut the plywood sheet into a rectangular shape, about 4 feet wide and 8 feet tall. Use a circular saw or a jigsaw to make the cuts.
- Attach the plywood: Screw the plywood to the wooden posts, making sure it is level and secure.
- Install the net: Attach the tennis net to the top of the plywood, using screws and brackets.
- Paint the backboard: You can paint the backboard with weather-resistant paint to protect it from the elements and make it more visible.
Tips and Tricks
- To make the backboard more challenging, you can add targets or lines to the plywood using tape or paint.
- To make the backboard more realistic, you can place a piece of foam or a pillow behind the plywood to mimic the bounce of a tennis ball.
- To make the backboard more portable, you can use wheels or casters to move it around easily.
- To make the backboard more durable, you can use pressure-treated wood or seal the plywood with a waterproof sealant.
You may enjoy reading What To Wear To Play Tennis
Benefits of Building a Tennis Backboard
Building a tennis backboard at home can offer many benefits for tennis players of all levels. Here are some of the advantages:
- Convenience: With a tennis backboard, you can practice anytime you want, without depending on a partner or a coach.
- Affordability: Building a tennis backboard is much cheaper than hiring a coach or renting a court.
- Versatility: A tennis backboard allows you to work on all types of shots and footwork, from forehands to backhands to volleys.
- Fun: Practicing with a backboard can be a fun and challenging way to improve your skills and fitness.
FAQs
How much does it cost to build a tennis back
The cost of building a tennis backboard at home can vary depending on the quality of the materials and tools you choose. However, on average, you can expect to spend around $200 to $300.
How long does it take to build a tennis backboard?
A: The time it takes to build a tennis backboard will depend on your experience and skill level. However, on average, it can take between 1 to 2 days to complete the project.
Do I need any special skills or knowledge to build a tennis backboard?
No, you do not need any special skills or knowledge to build a tennis backboard. The process is relatively simple, and the instructions we provided should be easy to follow. However, it is always a good idea to ask for help or advice from a professional if you have any doubts or questions.
What’s Next?
In conclusion, building a tennis backboard at home can be a great investment for tennis enthusiasts who want to improve their game and have fun at the same time. With a backboard, you can practice your shots, footwork, and stamina without relying on anyone else.
Moreover, the process of building a backboard is relatively simple, affordable, and versatile. So, if you are looking for a new way to boost your tennis skills, why not give it a try? Follow our step-by-step guide and start building your own tennis backboard today.
You may enjoy reading Do Tennis Players Wear Cups?


Comments are closed.